NOTE: We are working on migrating this site away from MediaWiki, so editing pages will be disabled for now.
Template:AWS Instance Access
Instance Access
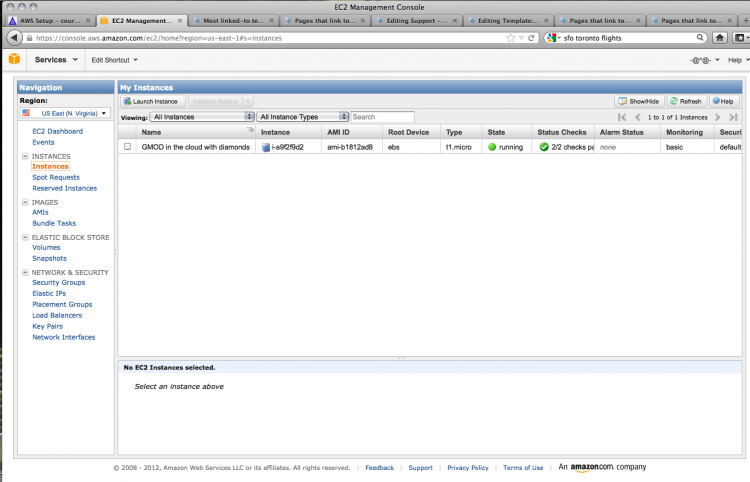
We can now test out our instance. Clicking on Instances shows us the list of all the instances we have running.
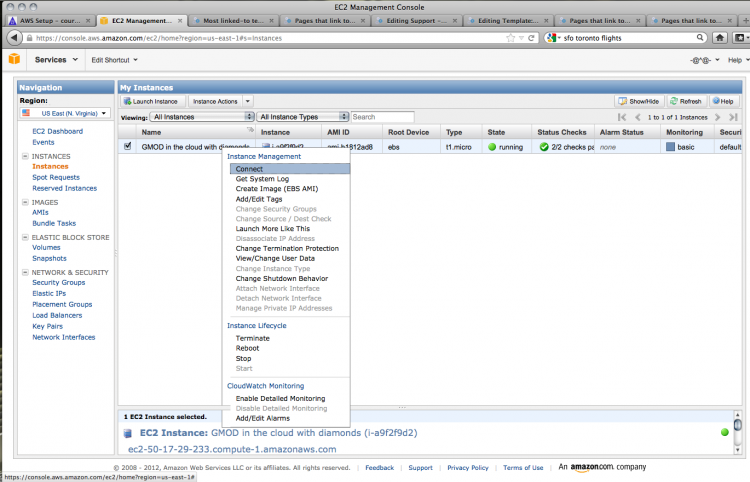
Go to the instance and right-click to bring up a contextual menu. Choose Connect.
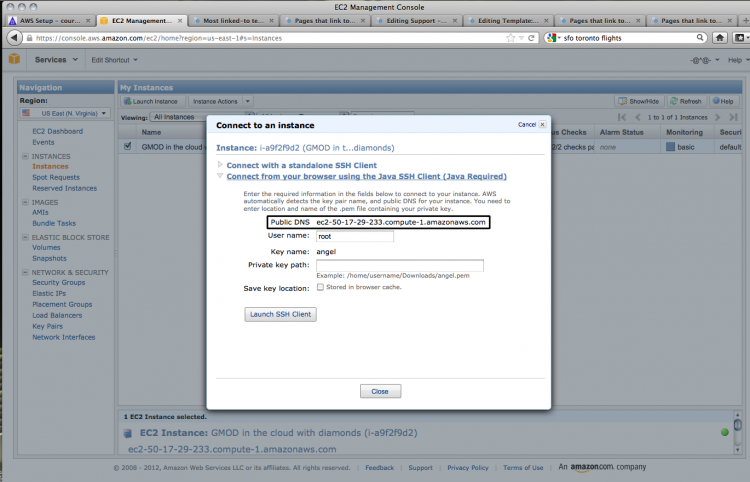
We can test the HTTP connection using the information from the dialogue box that comes up. Copy the public DNS address, found under the open heading Connect from your browser using the Java SSH Client (Java Required).
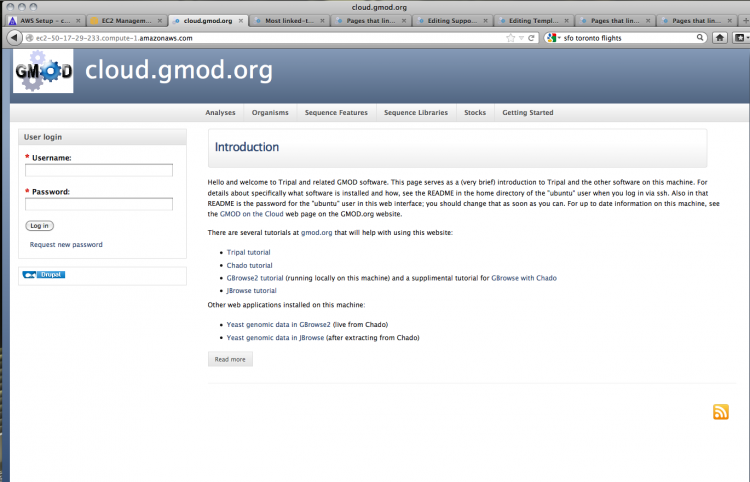
Open that address in a new browser window. If everything has gone correctly, you should see the following screen:
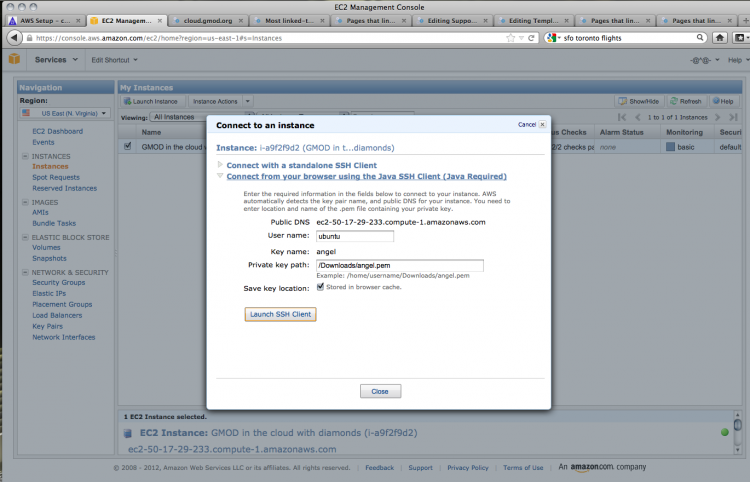
Now let's check the SSH connection. You can do this through your browser using the built-in Java client. You will need to change the user name to ubuntu and set the private key path to the location where you saved the private key that was generated earlier. Click Launch SSH Client to get connected.
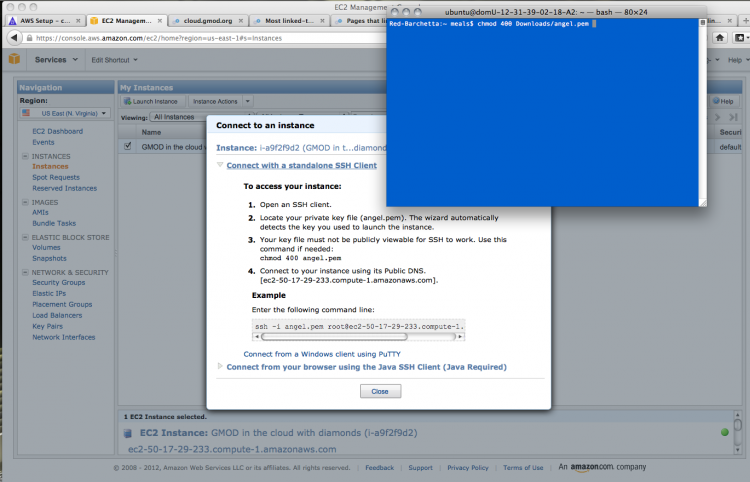
Most bioinformaticists worth their salt prefer a nice command line option, so click on Connect with a standalone SSH client to view the connection information. The first task is to change the file access permissions on the downloaded private key file.
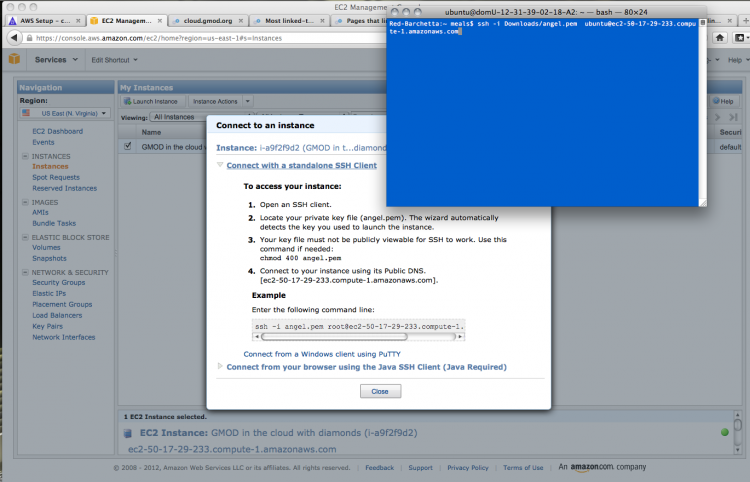
As with the Java browser-based SSH client, you'll need to change the user name from root to ubuntu. Copy the command given, substituting in the correct path to your private key file and the user name ubuntu.
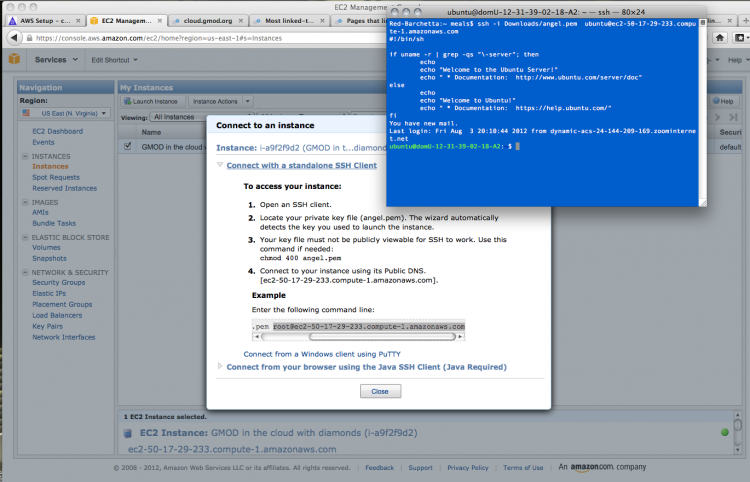
If all goes well, you should log in to the server and get a welcome message:
